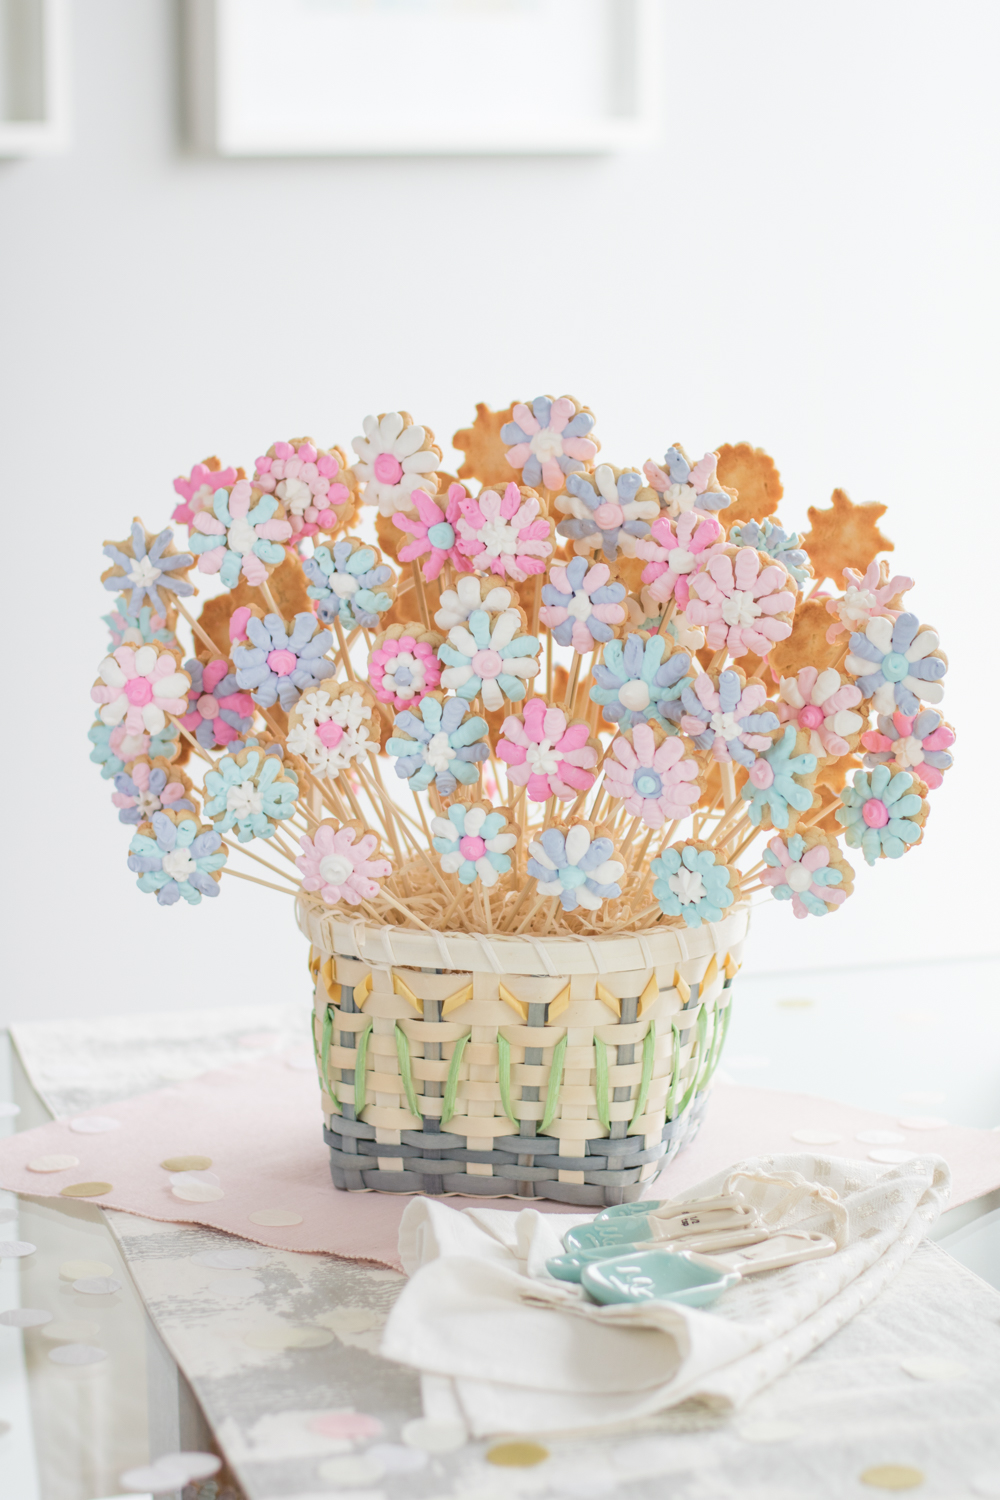
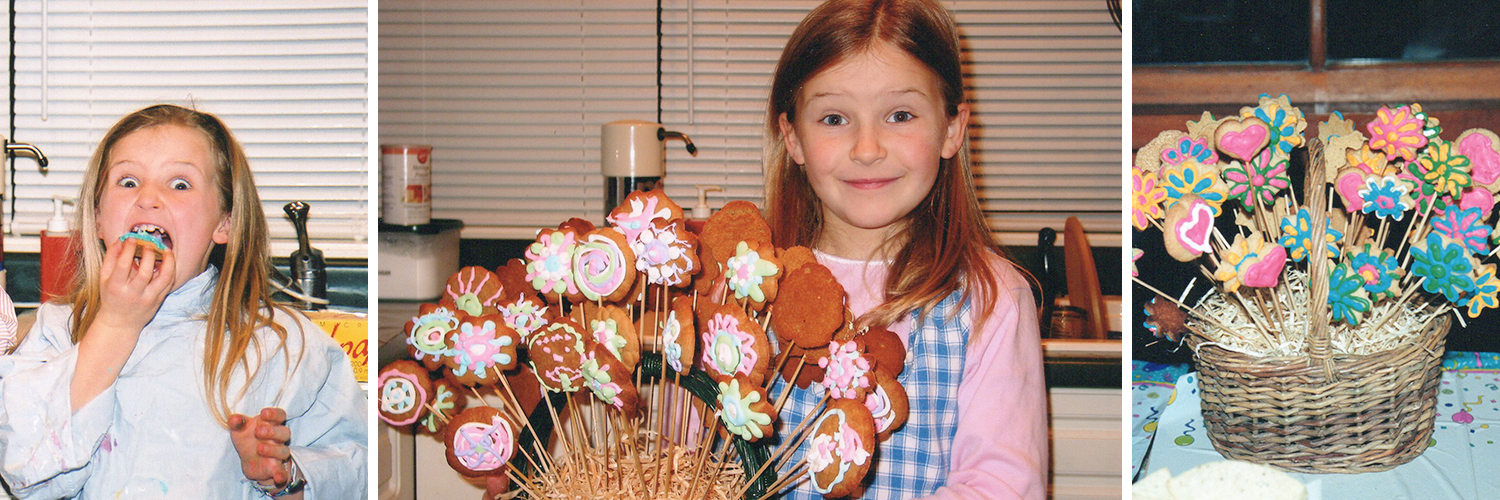
Is anybody else beyond thrilled that it’s finally spring?! Helloooo warmer weather, new clothes, and of course spring baked goods! 😉 And what’s better than beautiful sugar cookies to celebrate the season?! This flower cookie bouquet brings back so many memories for me, as I used to make it with my mom growing up (see throwback photos below). As you know I have always loved baking, crafts, and anything creative – so this was no different! We’d have so much fun baking together, and it was such a sweet reminder of that getting to spend the weekend with my mom creating this bouquet of cookies!
I know what you’re thinking, that it looks a little bit overwhelming, but trust me, this project is actually quite simple! There are a handful of steps, but all totally doable 🙂 And you know what I say, at the end of the day, it’s all about having fun!
I spent the other night looking through old photos trying to find these (haha which was so fun!) and here are the cutest shots of me as a child with the cookies my mom and I made!
So if you’re looking for a fun mother-daughter project (or to do with friends, or for your own Saturday afternoon) for Spring, Easter, or really anytime of the year – this is it! And you could totally decorate the cookies in fall colours for the fall, or at Christmas you could make them look like ornaments or little wreaths! Really the possibilities are endless, and you can obviously decorate them in whatever colours you want!
We used a cookie press to make our cookies, which is such a great kitchen gadget if you don’t already have one. It comes with a bunch of disks to create different flowers, so you can play around with it to see which styles you like best. It takes a little practice to get the right pressure and size, but if a cookie doesn’t come out quite right, just put it back into the dough and try again!

As I always recommend, gather all your supplies beforehand, so you’re ready to go when you start baking! We make the bouquet over two days – we baked and decorated the cookies on day one, and assembled the bouquet the next day. This was so the royal icing on the cookies had time to dry completely. You could do it in one day if you start early enough, but you want to make sure that icing is hard to the touch before you start assembling anything.
I hope you have as much fun as I did creating your own flower cookies! Happy baking! 🙂
Supplies to Make Your Flower Cookie Bouquet:
- Basket
- Basket Filler (crinkle paper or straw/rafia)
- Floral Foam (comes in green blocks)
- Skewers
- Cookies (recipe below)
- Cookie Press
- Royal Icing (I used Sweet Bake Shop’s recipe)
- Gel Food Coloring
- Piping Bag & Tips (a ziplock bag works too)
Step-By-Step:
1. Bake Your Cookies
Recipe (adapted from Martha Stewart):
- 1 1/2 cups unsalted butter, room temperature
- 2 eggs, room temperature
- 1 cup sugar
- 3 3/4 cups sifted all-purpose flour (measured after sifting)
- 1/2 tsp salt
- 1 tbsp vanilla extract
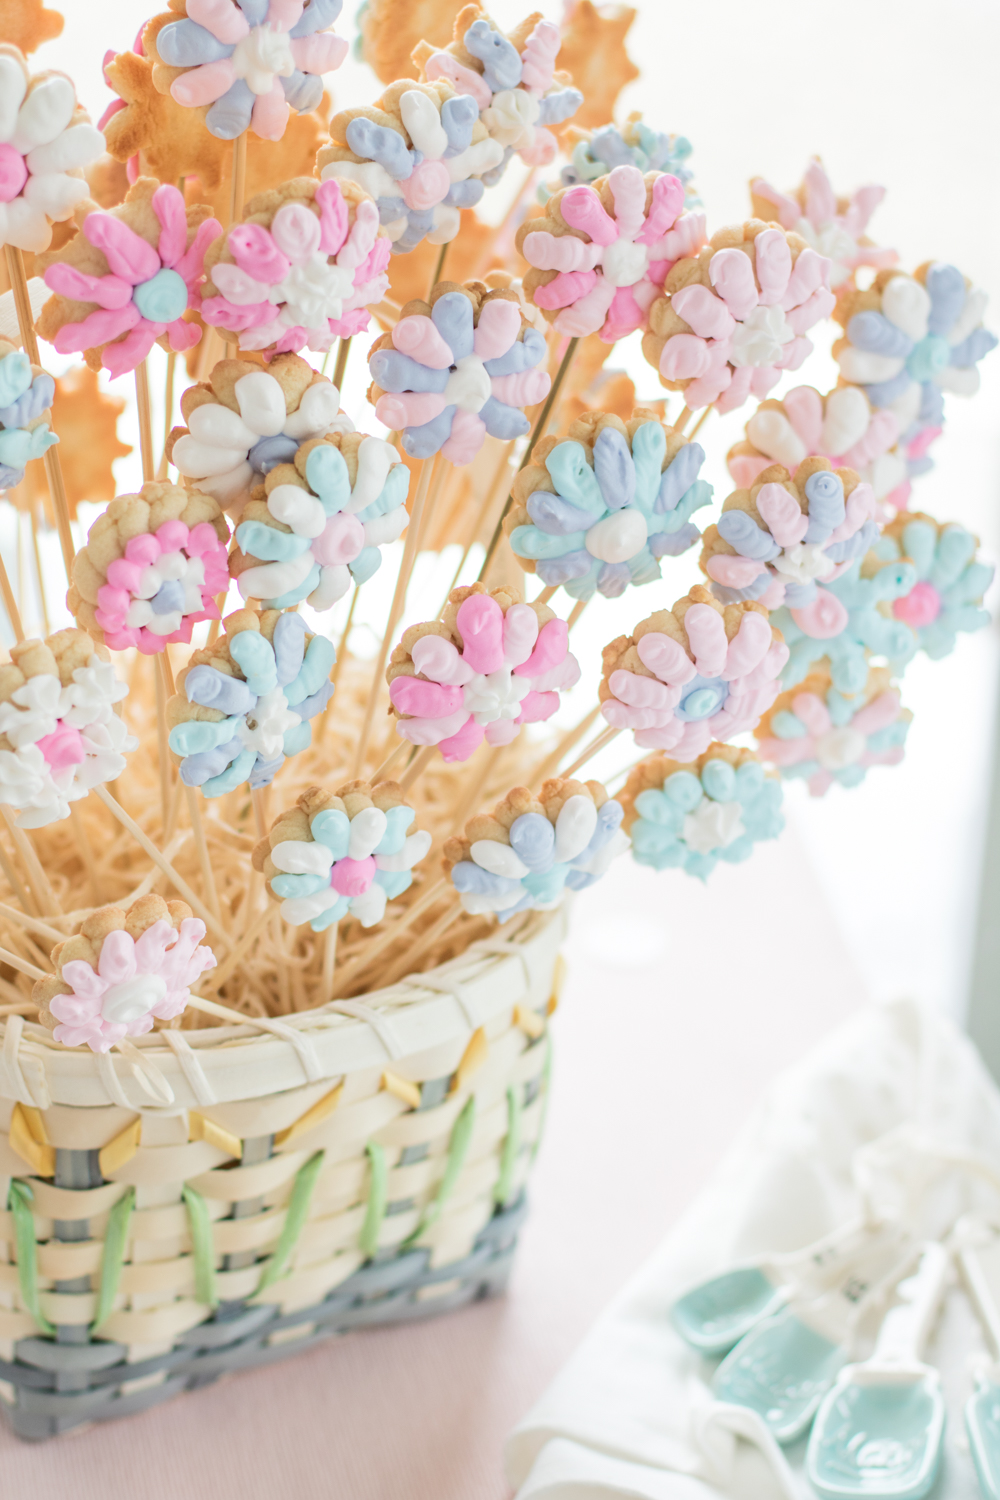
Note: The recipe easily made around 70-80 cookies, which sounds like a lot, but it was the perfect amount to fill my basket. You want that basket to be filled to the brim with beautiful flower cookies!
Instructions
1. Preheat your oven to 350 degrees.
2. In a large bowl, cream the butter and sugar until light and fluffy.
3. Add eggs, flour, salt, and vanilla. If your cookie dough doesn’t come together right away, you can take it out of the bowl and knead it by hand for a bit. (We found that helped because at first we only used egg yolks like Martha’s recipe said to, but the dough wasn’t binding. So we kneaded the egg whites back into the dough and it worked great!)
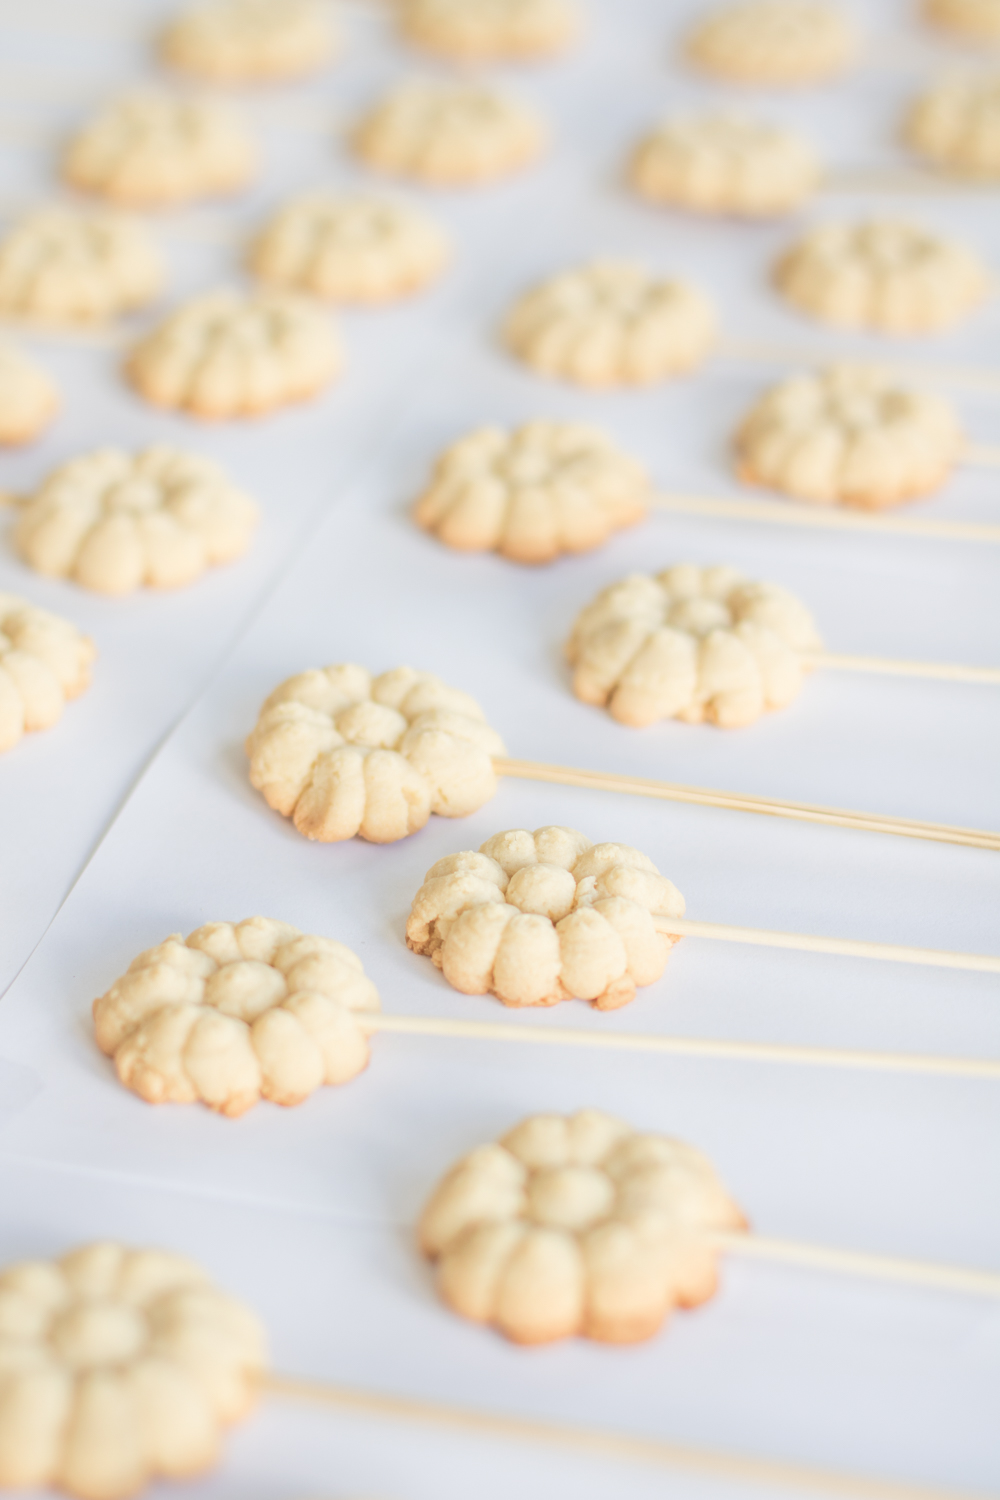
4. Put small amounts of dough, about a fist size, at a time into your cookie press. Trust me, it makes it way easier to press the cookies – haha we learned this the hard way after a few tries! It’ll take a little bit of practice to get the hang of the pressure, but then you can crank out the cookies quite fast. Press your cookies onto a parchment-lined baking sheet about 1 to 2 inches apart. They won’t spread so you don’t have to worry about that.
5. Bake 8 to 10 minutes until the edges of the cookies are golden brown. The middle/top of the cookie will still be light in colour. Rotate the pan halfway through to make sure they bake evenly.
6. Remove the cookies from the oven, and immediately put them onto a cooling rack so you can insert a skewer into the centre right away. You really don’t want your cookies to start to cool, otherwise you’ll break them when you try and insert a skewer.
7. Once your cookies are skewered, let them cool completely.
Note: If you don’t have a cookie press, an alternative would be to just bake regular, flat sugar cookies – I love Sweet Bake Shop’s sugar cookie recipe. You can still easily insert your skewers into the flat cookies.

2. Decorate Your Cookies
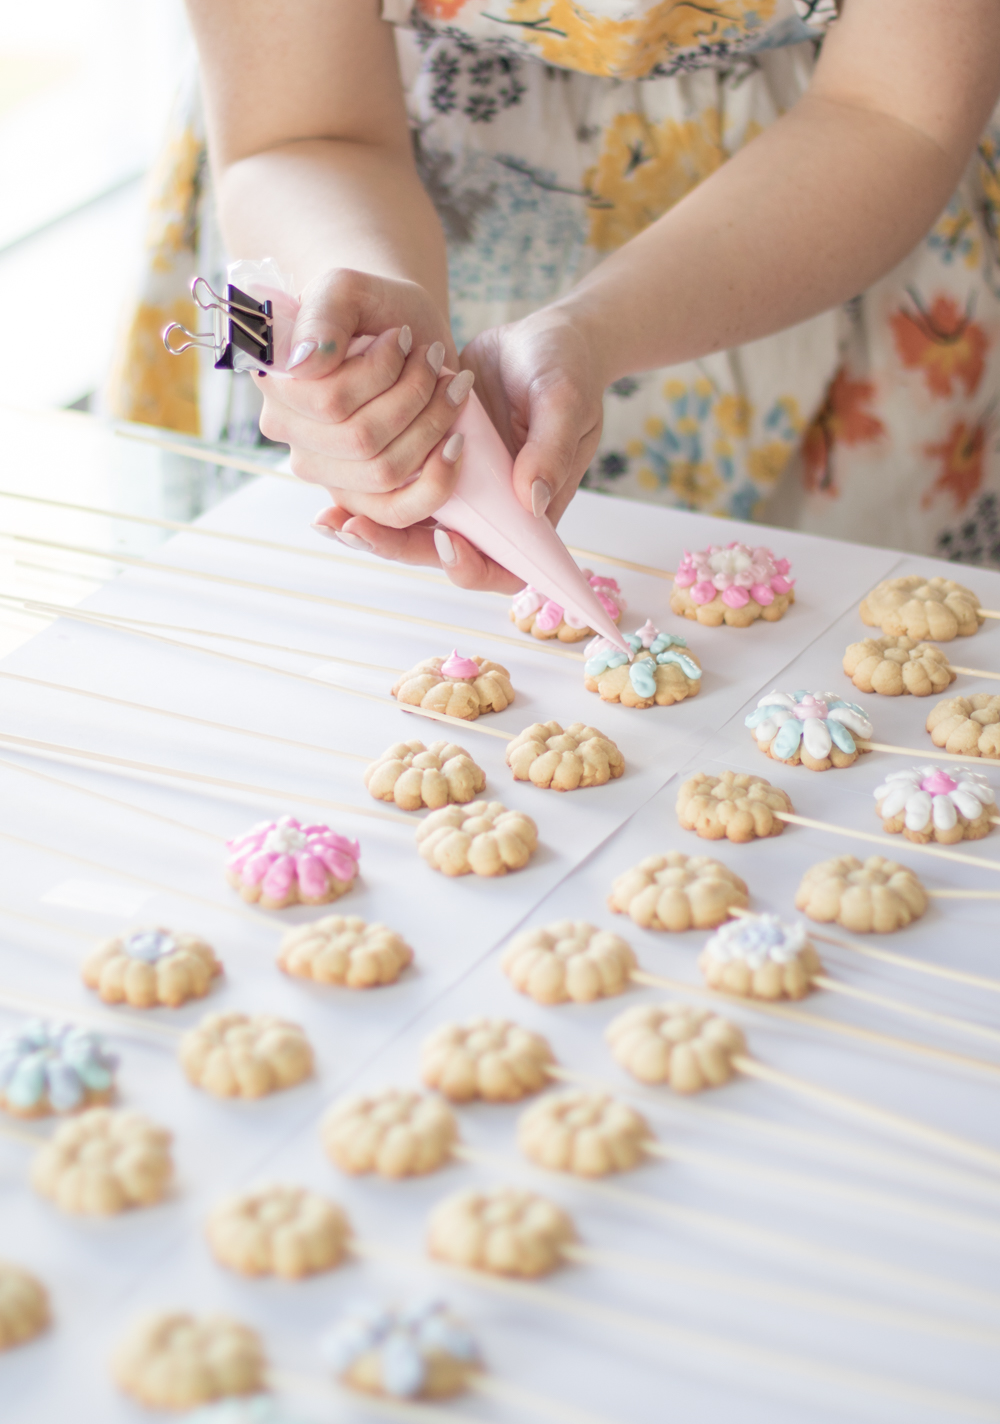
1. Make your royal icing – here’s the recipe again – to a medium consistency, with soft peaks. You don’t want your icing to be too liquidy otherwise it will run off the cookie, but if it’s too hard, it’ll be hard to pipe. Be sure to wipe down your mixing bowl with vinegar to get rid of any grease residue, otherwise your royal icing may not dry completely.
2. Divide your icing into separate bowls, depending on how many colours you want to have. We had four colours and then white, so five bowls in total.
3. Use a small amount of gel food colouring to colour your various bowls of icing. Remember – a little goes a long way! It’s better to start with less, you can always add more 🙂

4. Put your icing into piping bags fitted with the tip of your choice, or just snip the end of your piping bag off. You can also use a ziplock bag with a corner snipped off if that’s all you have, it’ll do the trick!
5. Decorate away! We laid all our cookies out on the table, and had so much fun making them all unique and different. Let the royal icing dry completely, either for a few hours or overnight. It’ll be hard to the touch when it’s dry.

3. Assemble Your Flower Cookie Bouquet
1. Cut your foam block as needed to fit into your basket. I divided it up into a few blocks so that it would fit snugly in my basket and not wiggle around. You don’t want your cookies to topple over because they’re not properly secured.
2. Cover your foam with the basket filling of your choice.
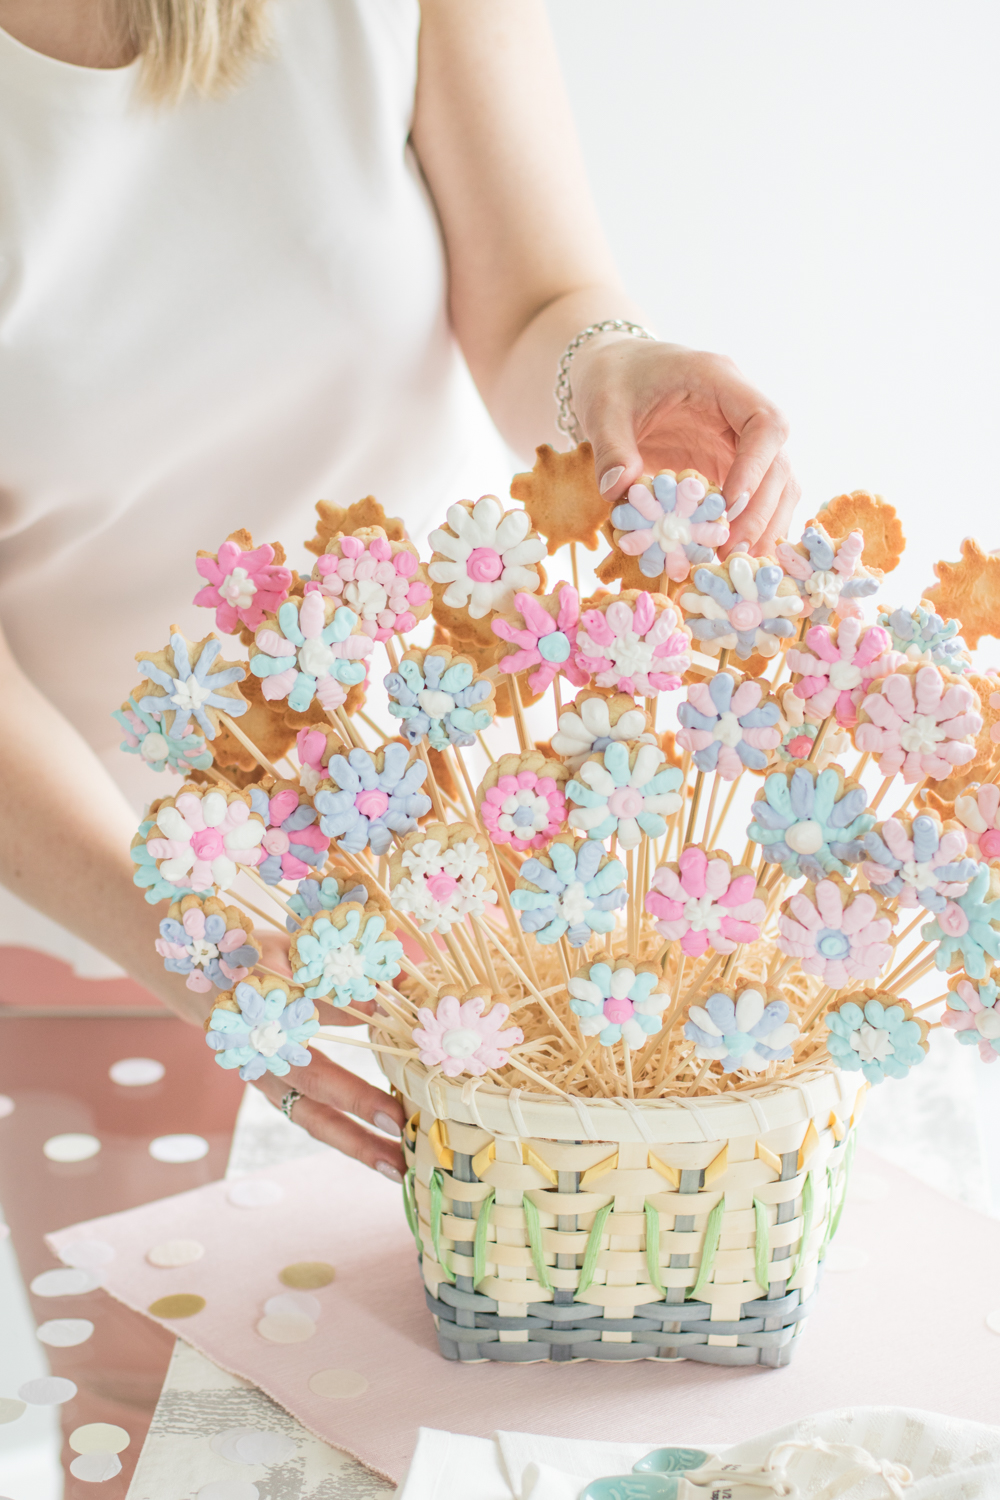

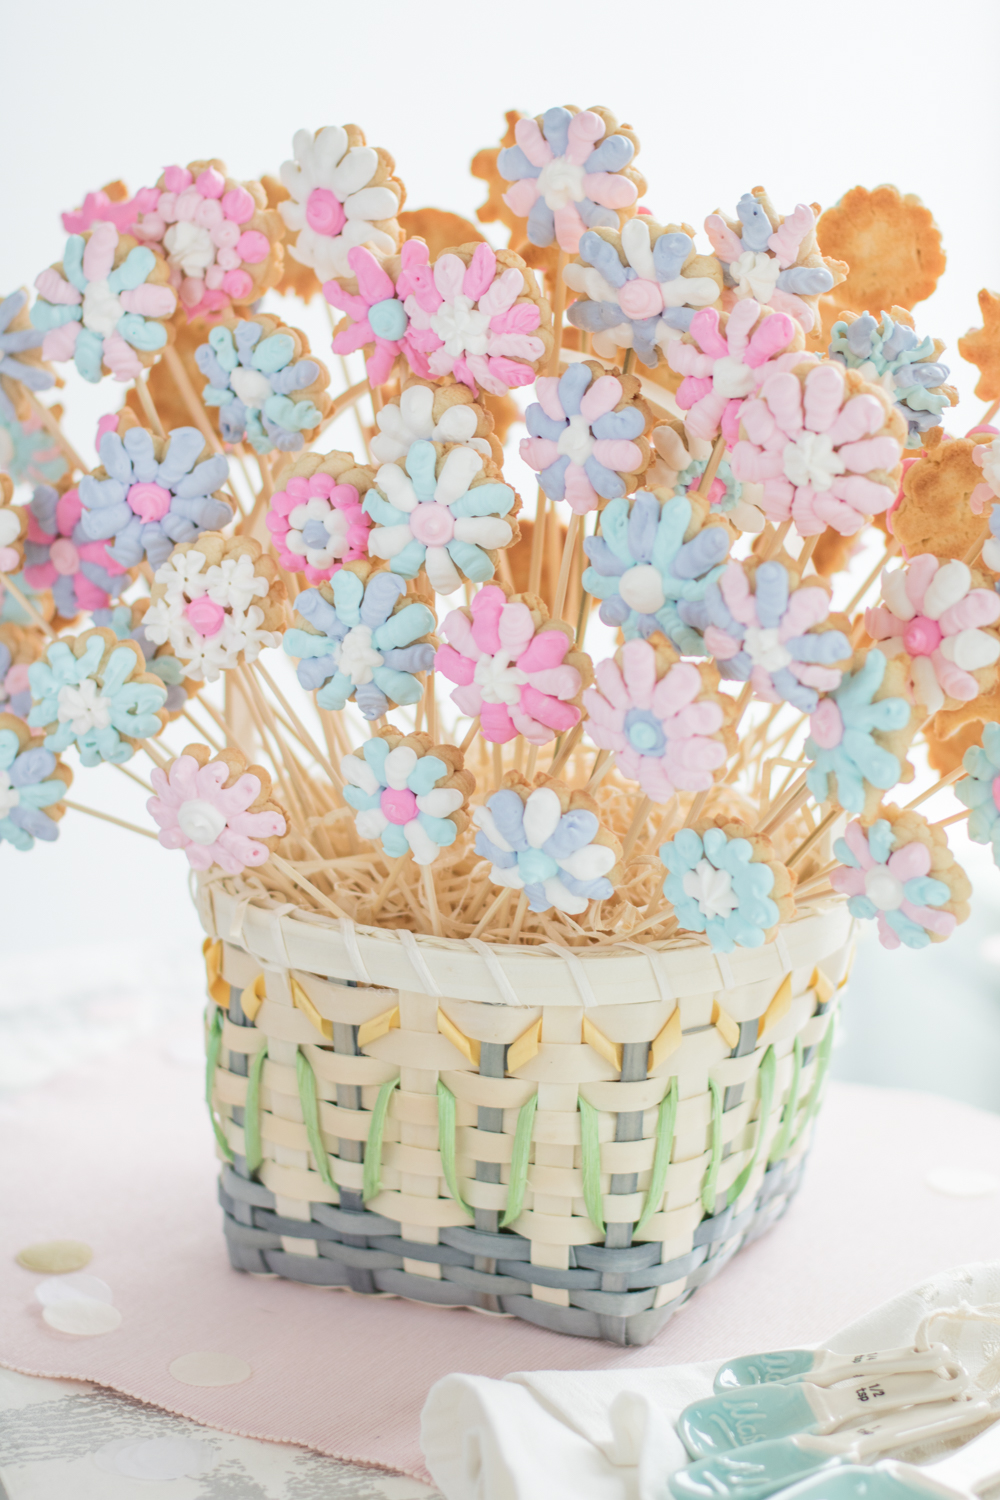
3. Start arranging the skewered flowers in all different directions and heights, all around the basket. This is one of those steps that you cannot screw up at all, so have fun with it! We cut some of the skewers different lengths so that we could have some shorter flowers in the front.
4. Keep going until all your flowers are in your basket and you’ve completed your flower cookie bouquet!


There you go! See I told you that it wasn’t very hard and you could totally create your own bouquet! I hope you have a ton of fun baking and getting creative!
If you’re not quite ready to tackle a cookie bouquet and are looking for some other sweet treats, check out my peanut butter explosion cookies and oreo caramel swirl cheesecake! 😉
As always, if you bake your own flower cookie bouquet, I would love to see a picture! Tag me on Instagram (@danielle.a.connor) when you share it! Can’t wait to see your creation!
XO
Danielle