
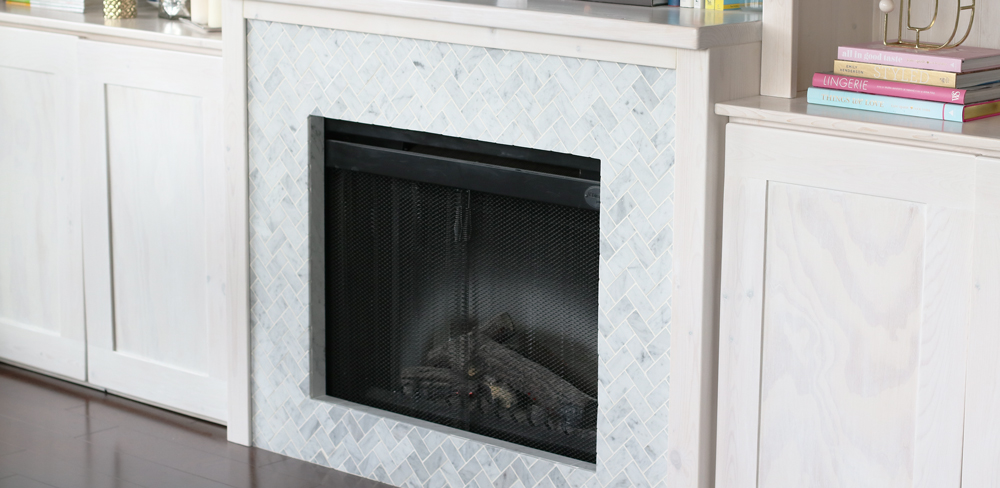
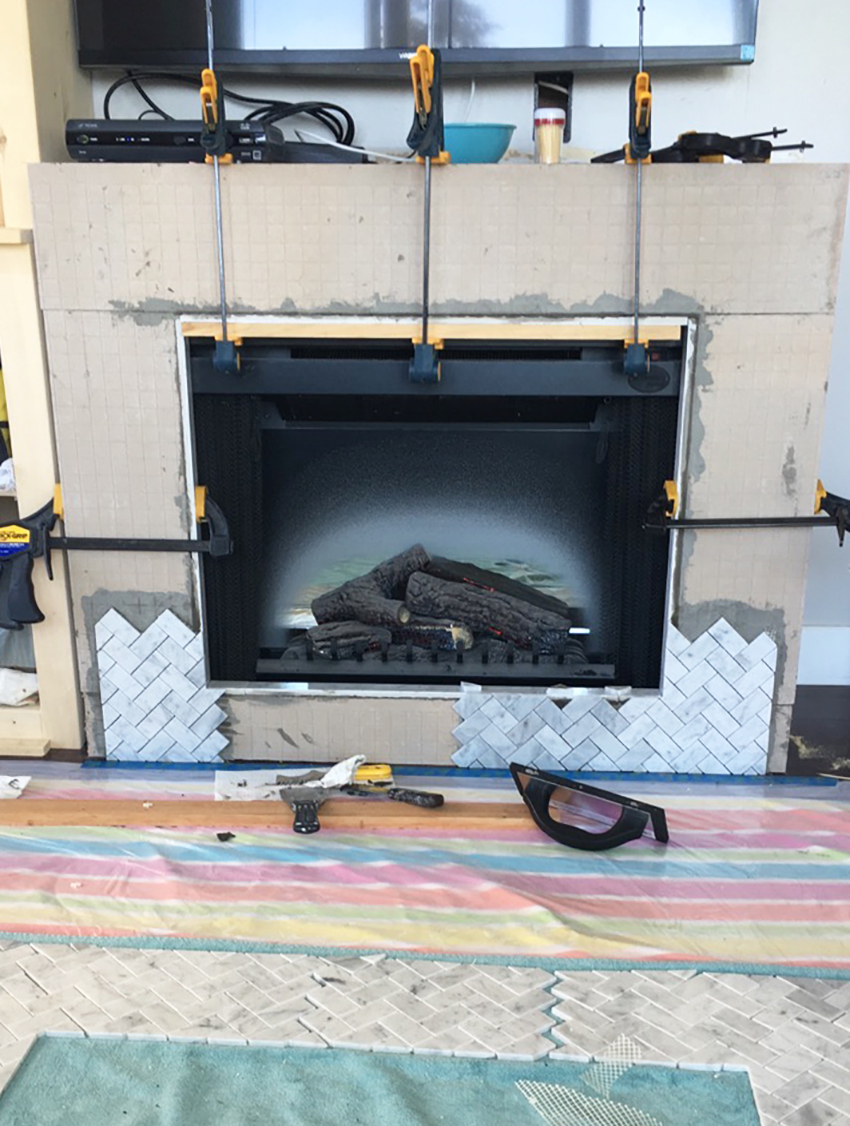
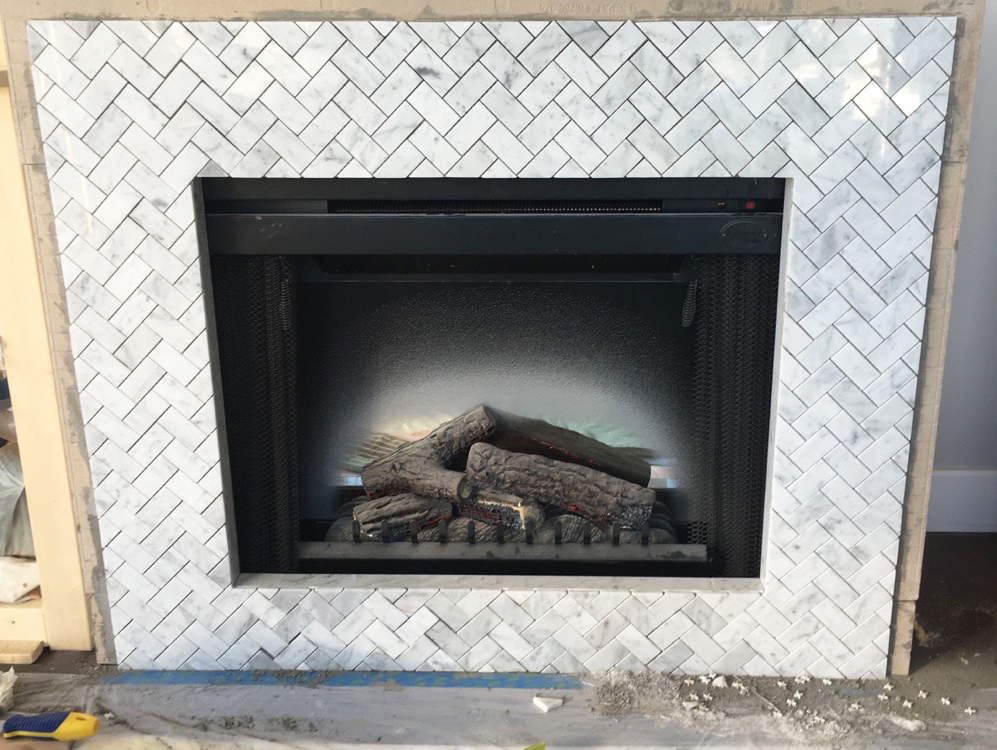
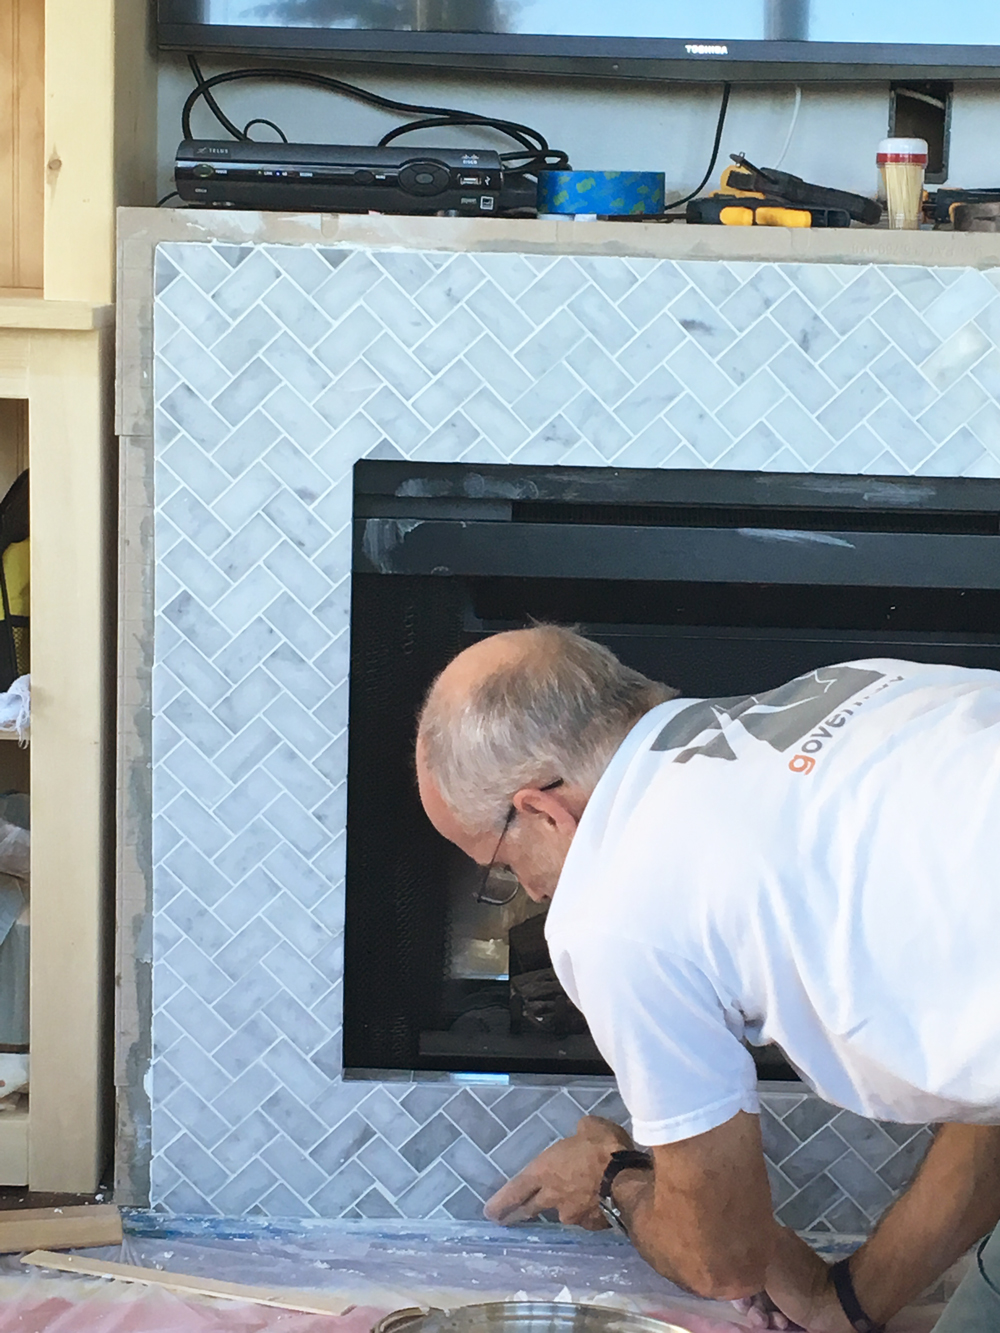
After tiling the front of the fireplace as part of our big DIY bookcases and fireplace surround project, I’m sharing some tiling tips that I learned along the way! From my research, I knew that tiling was a relatively straightforward project, so my dad and I decided to take it on after demolishing our old stone fireplace surround. It couldn’t be that hard after the bookcases we spent the last few months building, right?! True, and in comparison, it was one of the easier parts of the whole renovation project. But of course I managed to pick the trickiest tile – a one-inch-tile marble herringbone mosaic! Although I’m so glad that I did because it looks beautiful!
It really is amazing how an updated tile can change the look of a space. So if you’re itching to tackle that tiling project in your home, here are my top tiling tips:
Do your research
Before you start, do your research for the specific project you’re going to be undertaking (e.g. a backsplash, bathroom floor, fireplace). Look up blog posts, articles on renovation websites, or ask your local hardware store for project-specific tiling tips. We did a fireplace facade (which was somewhat similar to a backsplash), but if you’re doing a floor or a shower, do some research specifically for that project! The more you know, the smoother the process will be.
Examine the tiles you’re purchasing, especially at a discount store
If you’re working with a small amount of tiles like we were, look at all the tiles carefully. Take out every mosaic square from its box and look at it. It’s worth the extra time that it takes in the store to be sure all your tiles are the same colour, and that none are chipped or scratched. And at discount warehouses, it’s almost always final sale!
Make sure to buy extra materials
I made this mistake and bought just barely enough tile. I definitely cut it way too close. Especially after the chipped and discoloured tiles that we ended up with (because I didn’t open the box of tiles like I should have), it was a bit stressful making sure we could cover the whole surface. We could have done with an extra sheet or two of tiles to be on the safe side!
Lay everything out beforehand
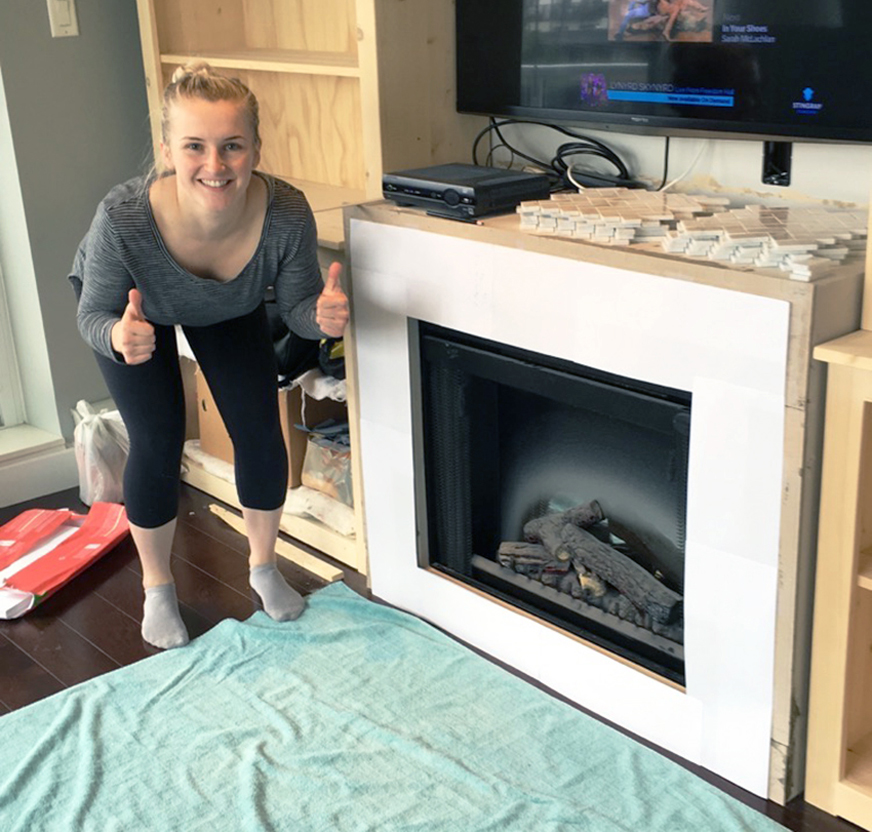
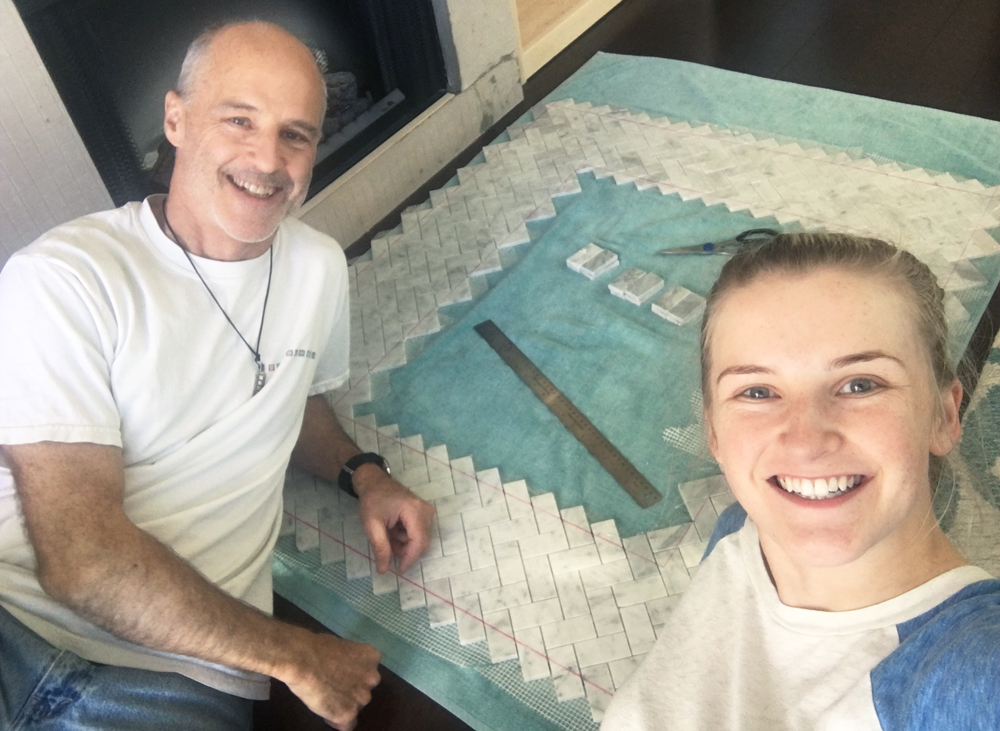
My dad has engrained the philosophy of “Measure Twice, Cut Once” into me, and it’s so true! For a larger, simpler surface (like a floor or backsplash), and when you have plenty of tiles, this isn’t as crucial. But since we were covering a fireplace surround with no extra tiles to make any mistakes, we traced out the surface. We created a mock paper version (see the first image above), laid that on the ground, and then laid all the tiles on top to figure out the proper layout, size, and pattern!
Use all the tiling tools
When I went to pick up supplies for this project, I bought all the tools you could possibly need for a tiling job. Then I simply returned the ones we didn’t use! It was great because if we needed a tool, I had it! It’s better to have that random tool when you’re in the thick of the project than have to stop everything and run to the store. This was a list of all the tools we ended up using:
- Plastic gloves
- Grout/mortar mixer attachment for drill
- Trowel
- Sponge
- Tile spacers
- Tile grinder
- Rubber float
- Mortar
- Grout
- Clear packing tape
- Wax pencil
- Wet saw (see next tip)
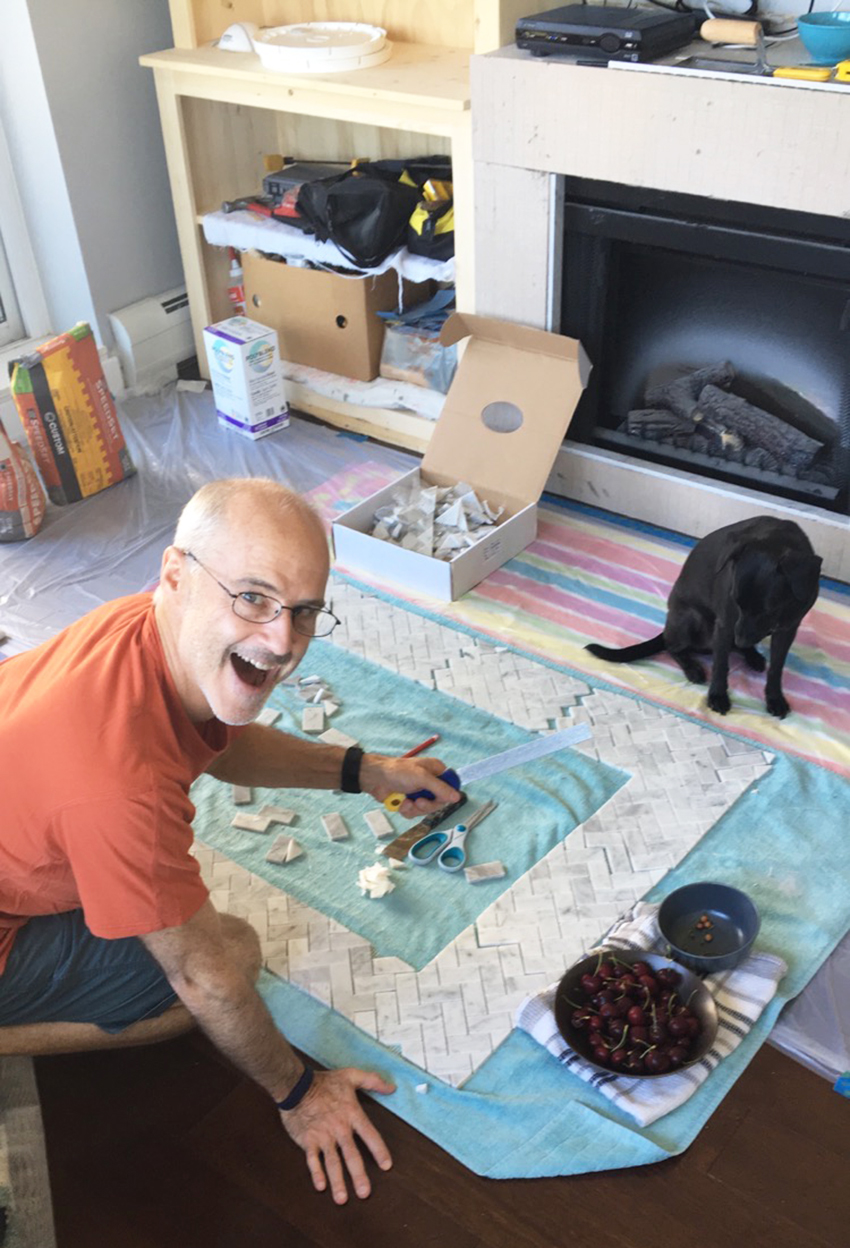
Rent a wet saw and set it up outside
I rented the standard tile saw from Home Depot, and we set it up on my balcony. At first I thought maybe we would be able to set it up inside, but not a chance. Put it outside, trust me! It is a bit loud, and I was a little worried about the noise level (we ended up using it at 6:30pm on a Sunday evening, because as usual everything took way longer than expected!). Look up a few how-to videos of the exact saw that you rent, as it differ a little from one model to the next. The process does gets easier as you go, but do a few practice runs before cutting the important tile edges. In our case, I would give my dad the tiles, he would cut them, and I would take off the packing tape and lay them back on our template.
Clear packing tape works wonders
Mosaic tiles come attached to a mesh backing, and when it gets wet from the water on a tile saw, the glue softens and your tiles come loose. We attached clear packing tape on both the front and back of the tiles when we ran them through the saw to secure all the little pieces, and it kept everything in place! Take the tape off though as soon as you’ve cut the tiles, as you don’t want any tape residue to become stuck to your tiles.
Plan accordingly – not a one-day job
We thought that we could get this little project done in one day. News flash – it took us three! One day to set up all the tiles, plan everything out, and cut the tiles. Another day to glue all the tiles to the fireplace and make sure they were spread out properly. And once the mortar had dried and the tiles were secure, it took a final few hours to grout the tiles and tidy everything up. So if anything, overestimate the amount of time you think it will take!
I’m thrilled to see how our tiling job came together, it looks great! Now the perfectionist in me knows our fireplace facade is a DIY project… it’s not totally 100% perfect. I won’t point out the flaws that I see, haha but it’s okay! Like my dad likes to tell me when I’m having a little freak out moment, it all adds character! 😉 I really am so happy though with how it turned out, and now I know how to tile for any future DIY projects! I hope these tiling tips help you with your next home reno project!
Have you taken on a tiling project, or are you planning to?! Comment below with any tiling tips or questions you may have!
XO
Danielle
P.S. Want to stay up to date with the latest posts – recipes, DIY projects, travel tips, and life hacks? Be sure to subscribe to the blog over on the right side bar!