
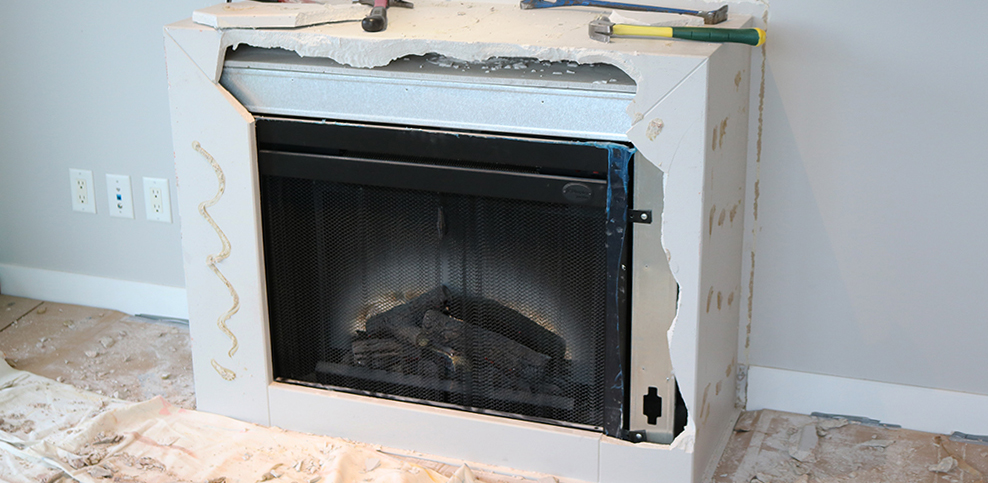
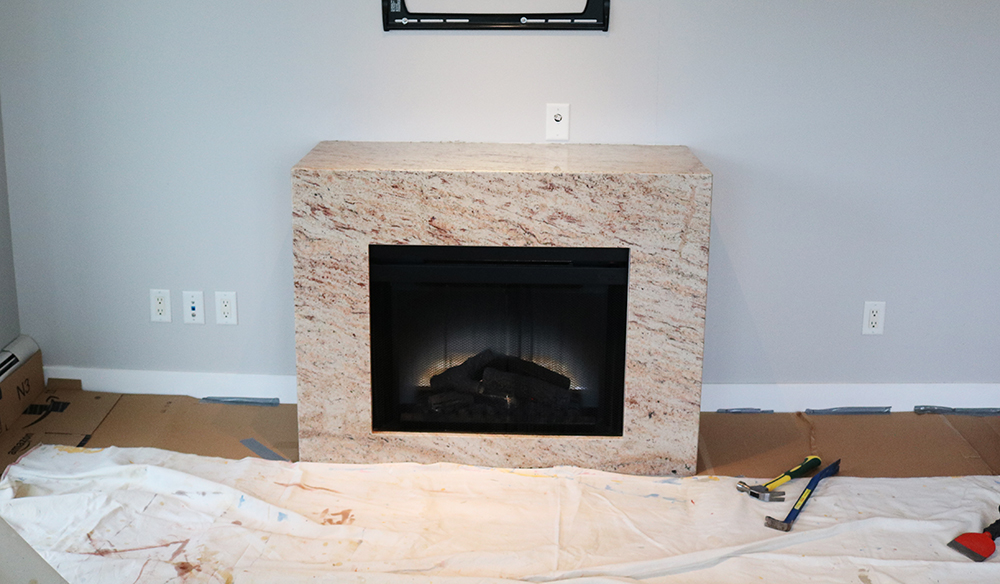
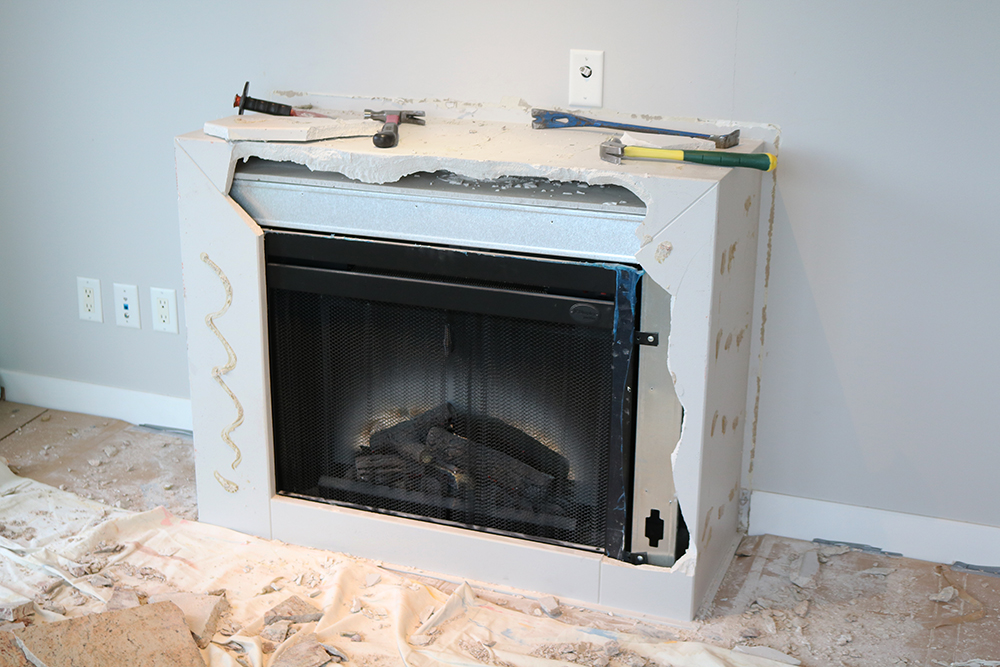
Hi everyone! Things are slowly coming together in our new apartment, albeit a little slower than I would like, but it’s definitely making me practice my patience! Decorating our new place, finding the right pieces, building the built-ins, and updating our fireplace all take time! Last week, I FINALLY got to demo the awful brown marble stone surrounding our fireplace. The whole process was relatively quick, and we managed to get it done in under two hours (not including cleanup).
One tip before I get to the actual demolition, make sure to let your strata manager know that you’ll be doing any kind of demo! I didn’t because I figured since it was such a small project, it wouldn’t matter. Little did I know that the hammering would reverberate through the whole building, so we got a nice visit from our building caretaker after he searched every floor trying to find where the noise was coming from – I felt so bad! Anyways, just let them know, that way if people complain about the noise, your building’s caretaker will know what’s going on. Now onto the fun part – demolition! Here’s how we did it!
1. Protect your floors!
I covered our entire living room in cardboard boxes and layered a drop cloth on top to protect our hardwood floors. I know how easily they dent and flying pieces of marble was NOT going to do my floors any good.
2. Cover or put away your furniture
We didn’t cover too many pieces of furniture; I’ll admit I was a little lazy in that regard. But if you have a nice new couch or armchair, put a drop cloth or sheet on top. You would not believe the amount of little bits of marble that flew across the room. We also removed smaller furniture like the coffee table and side tables, just so there would be more room and less surfaces around.
3. Wear eye goggles, a dust mask, and gloves
Those little pieces of marble will go flying, and you DO NOT want them in your eyes! I was also surprised at how much dust ended up all over our apartment, so a dust mask is a good idea to protect you from breathing in any of those particles. The gloves will protect your hands from little shards as well. I wore a pair of old ski gloves (and yes, my hands were very warm), but I’m glad I did because my dad ended up with a handful of little cuts on his fingers and hands.
4. Start hammering!
I was so scared to take the first swing at that fireplace, haha so thankfully I had my handy construction partner – dad – to help with getting the demolition started! I had been told to start with the corners as those are the weakest points, so we hammered away until we could see the concrete box underneath – success! We still had a ways to go though.
5. Keep hammering!
Once we got through the corners, my dad had these chisel-like tools that he used to break apart the seam and marble. Those ended up being a lifesaver and made the job go MUCH faster than if we had have just used regular hammers for the whole thing. We jammed the flat ended tool in the seam and hammered away, and that broke up the seam quickly. We managed to get a whole side off in one go since it wasn’t glued down at all and we broke the seal on the top and side. The pointy tool came in handy to break the marble into smaller pieces, that then came off easily.
And that was really it! I wasn’t sure what to expect, as I couldn’t find many tips or tricks online beforehand, so I hope this helps! You don’t need to rend a special demolition hammer (although maybe that would have made the process even easier), we managed just fine without one. The cleanup was a whole task in itself! Since you can’t get rid of that much stone in just any household garbage bin, we took it to our nearest transfer station, where it was only $25 to properly dispose of it. Then I cleaned up the rest of the little pieces all over our apartment, and just threw those out. After A LONG TIME of sweeping, we were finally getting somewhere. A final vacuum and dusting of my entire apartment (there was a thin layer of dust across my whole floor, table, kitchen), and we were done!
Unfortunately, the front part of the concrete box underneath was glued to the stone, so we’re going to have to fix that before being able to tile around the fireplace (with GORGEOUS white marble herringbone tile!!). So stay tuned for that DIY post! Anyone have their own experiences with fireplace or stone demos? What tips and tricks did you learn?