Who’s excited for Christmas?! And Christmas décor?! Another one of my favourite aspects of the holidays is getting to decorate our home! Today, I’m sharing an easy DIY project to dress up your table with a beautiful Christmas centrepiece. I’ll show you a few simple steps on how to create a centrepiece like the one I made, but take my tips and make this your own! There is so much freedom with this fun little project! I want you to create something that fits within your décor, uses items that you already own (so it doesn’t cost a fortune!), and adds that special holiday touch to your home! 🙂
One of my best childhood Christmas memories is going with my family to cut down our Christmas tree! We would go every year, and today, Guido and I still continue this tradition now that we have our own home. So needless to say, I love the smell of Christmas trees, and being able to bring the outdoors in! Even if you can’t have a live tree in your apartment, this is a great way to bring in a bit of nature! For this centrepiece, I went to the local garden store and bought a bundle of cedar branches to use as my base. You can definitely go out into the forest if you have one nearby, but sometimes it’s just easier to go and pick them up at the store. They’re dry, clean, already cut nicely, and less hassle!
Gather Your Supplies
First things first, I like to gather all my supplies so I have them laid out and ready to go. I can easily see what I have to work with! I always rummage through our Christmas and home décor items to see what could work well. The options are really endless, and I find it fun to switch it up year after year. Last year I used a red table runner instead of white, and had a few more glass cloches on the table! Here are a handful of items that you can use in your centrepiece – but by no means is this an exhaustive list!
- Tree branches
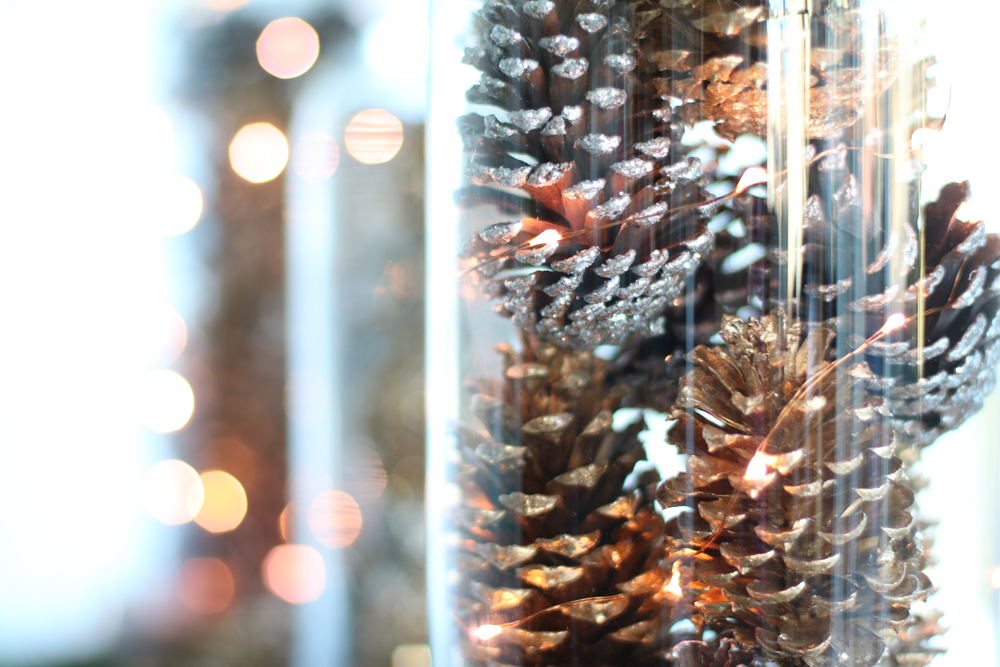
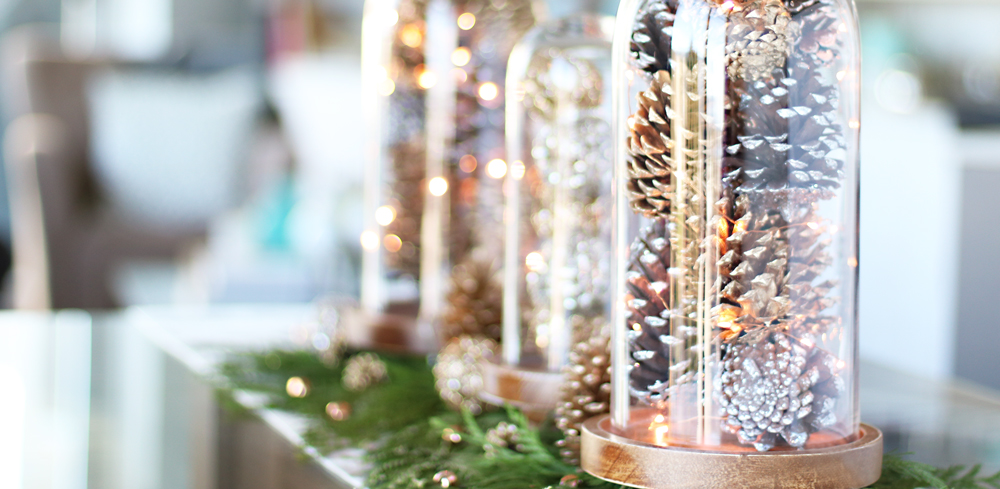
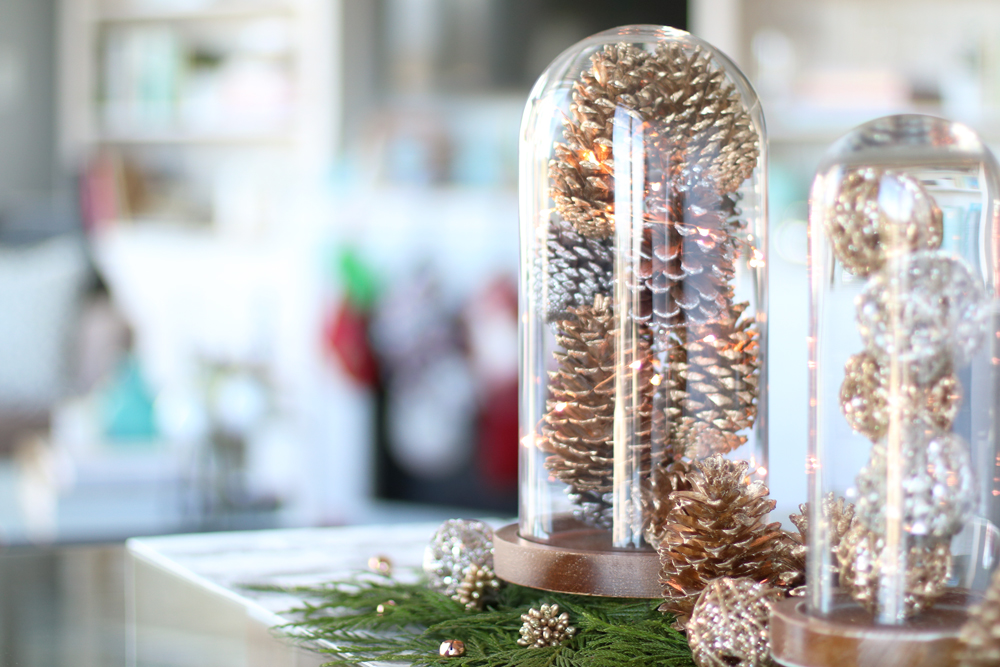
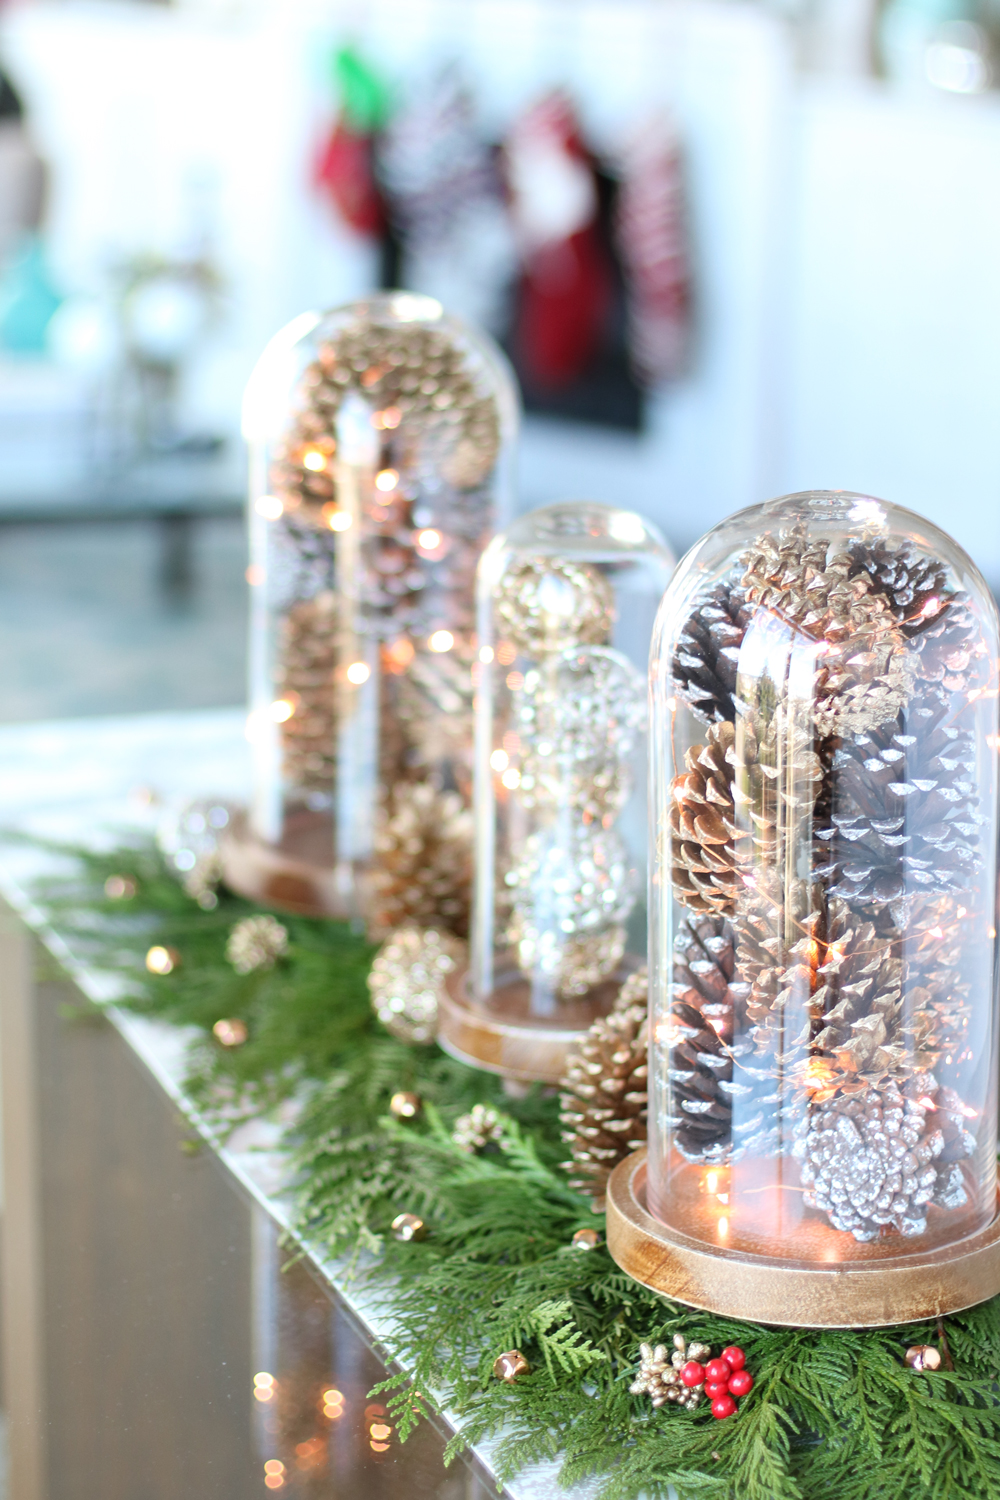
- Glass cloches
- Ornaments
- Christmas lights
- Pinecones
- Glitter balls
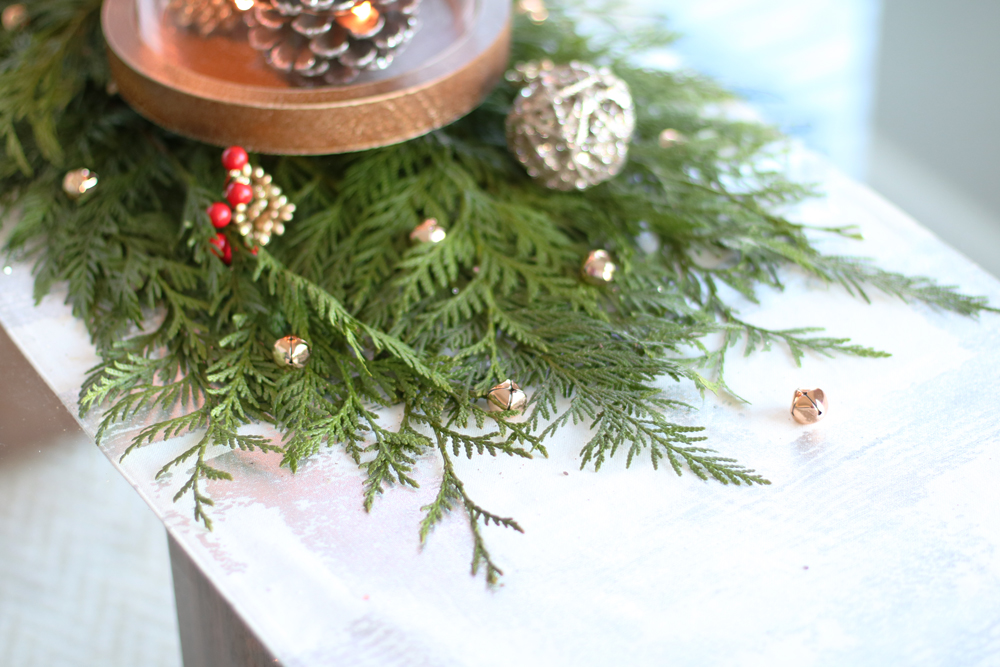
- Red or gold berries
- Bells
- Candles (don’t light them, just keep them as decorative pieces!)
- Any other Christmas décor
Time to Create your Centrepiece
I like to start from the bottom up, working from the largest to smallest items. I filled my glass cloches first with pinecones and the string lights, and placed those on my table runner. From there, I cut up the tree branches into smaller and more manageable pieces. I then laid those around the cloches in various directions, layering them to create depth, and working my way from the centre outwards.
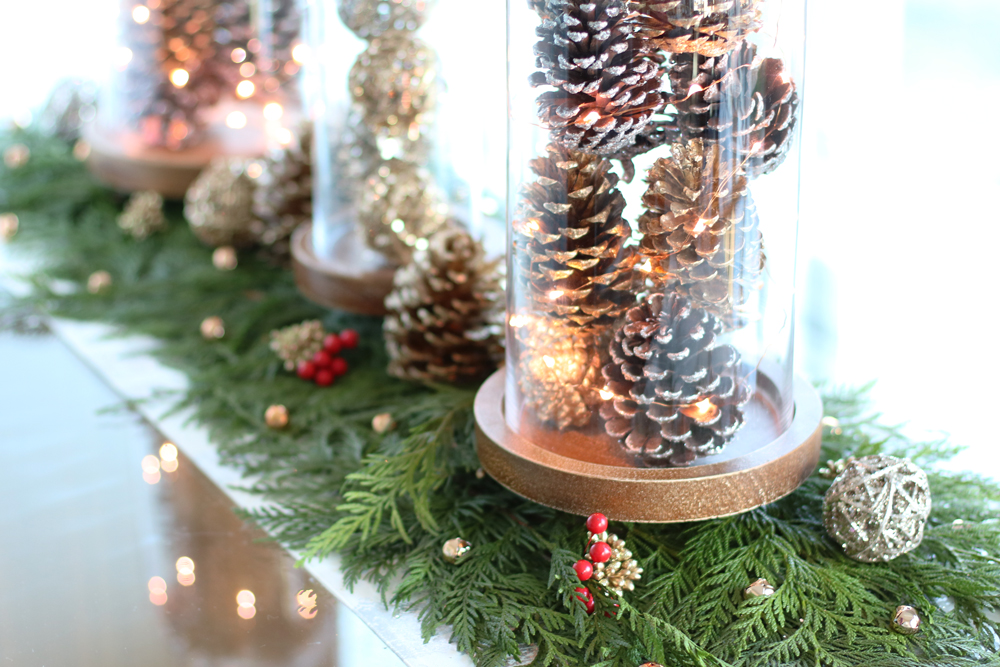
Once your main base of branches is laid out, it’s time to add all the fun little elements! I added pinecones, glitter balls, red and gold berries, and bells throughout the centrepiece. It’s really just a matter of playing with the placement of everything until you’re happy with how it looks! I like clustering things around the cloches (e.g. like the pinecones), scattering the berries throughout the branches, and placing the smaller items (e.g. the bells) closer to the edges. You want to create visual interest, but a sense of balance as well, where things are taller and clustered in the middle, then fade away towards the edges of the centrepiece.
Lastly, but most importantly, don’t forget to have fun! Make a centrepiece that’s special to you, and that you’ll enjoy looking at throughout the holidays! Be sure to share your creations over on Instagram and tag me (@danielle.a.connor), because I’d love to see what you came up with! Or if you have any suggestions of something you did that turned out beautifully, share it below! I love to hear all your creative suggestions!
Happy holidays!!
XO
Danielle